

Updating a Small Kitchen Without Replacing the Units
Why the Units Can Stay
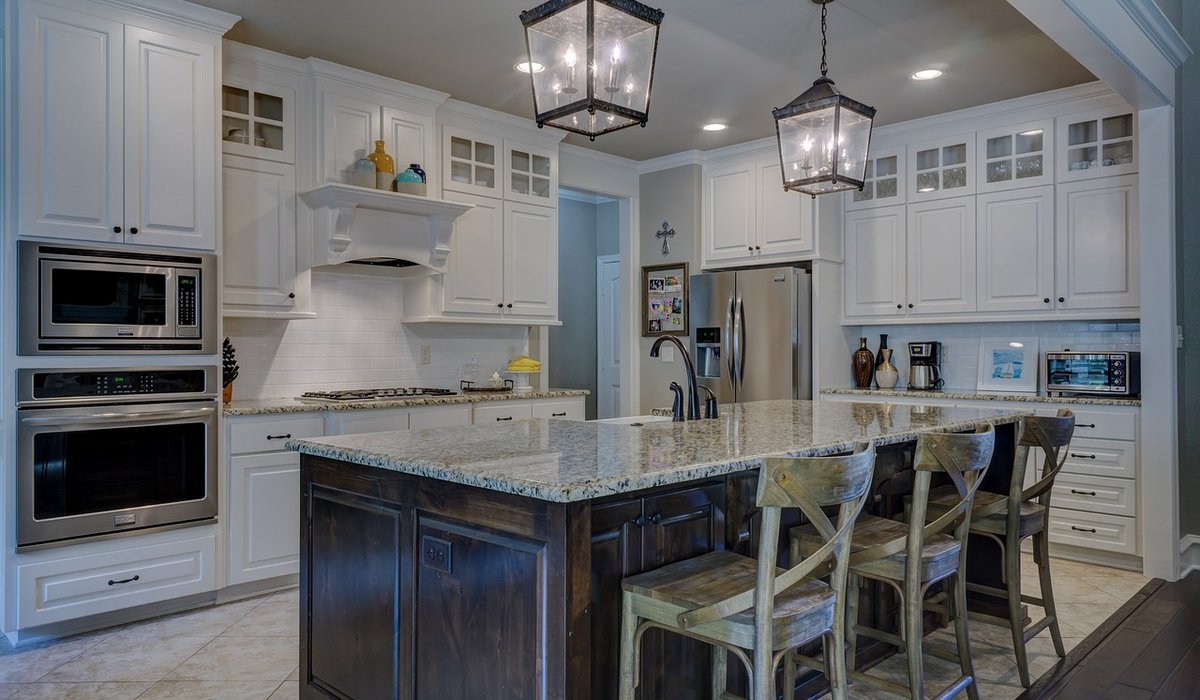
Most small kitchens don't need ripping out. The carcasses — the boxes behind the doors — are usually solid, level and perfectly serviceable. What dates a kitchen is the front: tired doors, dated handles, flat lighting and cluttered worktops. Refreshing those four things costs a fraction of a full refit and takes a long weekend rather than a fortnight. You also avoid the skip, the dust and the weeks of washing up in the bathroom.
Work through it in a sensible order, starting with the change that gives the most back for the least money.
Painting the Doors: Preparation Is Everything
A painted finish only looks good if the surface underneath is clean and slightly keyed. Rushing this stage is why so many kitchen paint jobs look patchy by month three.
- Take the doors off and number them, along with their hinges, so they go back in the same place.
- Wash each door with sugar soap and warm water, then rinse and let it dry completely. Kitchen grease is invisible until paint refuses to stick to it.
- Sand lightly with 120-grit paper — just enough to dull the shine.
- Wipe away the dust with a damp microfibre cloth.
If your doors are melamine, laminate or vinyl-wrapped, use a bonding primer made for glossy surfaces; bare wood and MDF take a standard primer more readily. Then apply two or three thin coats of a hard-wearing eggshell or satin made for woodwork or cupboards. Thin coats are the trick: a foam roller for the flat panels and a small brush for recesses and edges, with a light rub down between coats. Leave 24 hours before refitting, and avoid slamming the doors for a week. If painting feels like a step too far, replacement doors made to fit your existing carcasses still avoid the cost and disruption of new units.
New Handles, Enormous Impact
Handles are the fastest update in the room and the one visitors notice first. Measure the distance between the centres of your existing screw holes before buying — 96mm, 128mm and 160mm are the common sizes. If new handles don't match, you'll need to drill fresh holes and fill the old ones with wood filler, sanded flush and touched in with paint.
Keep the style consistent across a small run. Slim brushed-metal bars and matte black T-bars suit modern flat doors; cup handles and small ceramic knobs sit well on shaker fronts. Soft-close hinges can also be retrofitted to standard 35mm cup hinges in a few minutes per door.
Light It Properly
Lighting does more for a compact kitchen than almost anything else. Aim for three layers: a general ceiling light, task light over the worktop, and a warm accent for evenings.
- Under-cabinet LED strips in warm white, around 2,700–3,000K. Cool white makes a small kitchen feel like a shop.
- A dimmable main light on a smart plug if you'd rather not rewire.
- A slim pendant over the sink or island if headroom allows.
Plug-in strips are fine where there's a socket nearby; anything hardwired should be done by a qualified electrician. Choose a diffused strip rather than bare LEDs, especially over glossy worktops, and run it near the front edge of the cabinet so it lights the surface rather than the wall.
Open Shelving and Clever Storage
Swapping one wall cupboard for a shelf can make a narrow galley feel twice as wide, because your eye travels to the wall instead of stopping at a box. Keep shelves around 200–250mm deep so they don't crowd the worktop, and fix them into studs where possible, or use heavy-duty plasterboard fixings rated well above the weight you plan to store.
Height matters: roughly 450mm above the worktop for everyday items, and at least 600mm above a hob — or better still, no shelf over the hob at all if you fry often. Style open shelves with a few mugs, jars and bowls grouped by colour, and leave visible gaps. A crowded shelf looks worse than a closed cupboard.
A Slim Island, and the Space Rule to Respect
Some kitchens have just enough room for a slim island or a shallow breakfast bar. Others don't, and forcing one in makes the room feel cramped and awkward to use — particularly with the oven door or dishwasher open.
The rule is simple: allow at least 900mm of clear floor between the island and the units behind, and closer to 1,000–1,200mm if two people will be moving about. Measure it with the dishwasher open. If you can't get 900mm, consider a butcher's block trolley on castors that tucks away, a 300mm-deep console table against a wall, or a fold-down ledge. All give you landing space without blocking the walkway.
Finish with the small things that pull it together: a new tap, fresh sealant along the worktop, a grout pen over tired tiles, and a little texture — a woven runner, a wooden board, a plant. Repaint the ceiling and the wall above the units in a light, warm neutral, so the cabinets have something calm to sit against.


Interiors
-
Consider quartz, solid laminate or treated wood for durability, checking heat resistance, edge profiles and maintenance before ordering bespoke kitchen worktops.

Kitchens


-

Long established fact that a reader will be distracted
-

Long established fact that a reader will be distracted
-

Long established fact that a reader will be distracted


Renovation
Karla Gleichauf
12 May 2017 at 05:28 pm
On the other hand, we denounce with righteous indignation and dislike men who are so beguiled and demoralized by the charms of pleasure of the moment
M Shyamalan
12 May 2017 at 05:28 pm
On the other hand, we denounce with righteous indignation and dislike men who are so beguiled and demoralized by the charms of pleasure of the moment
Liz Montano
12 May 2017 at 05:28 pm
On the other hand, we denounce with righteous indignation and dislike men who are so beguiled and demoralized by the charms of pleasure of the moment